

How Often To Change Oil In 2015 Toyota 4runner

How to Change the Oil and Oil Filter on the 5th Generation Toyota 4Runner
There are many different types of maintenance you can do on a vehicle, only quite possibly the nigh important is irresolute your vehicle's oil. If you are wanting to have a reliable and long-lasting vehicle, I would propose changing your oil every v,000 miles. Y'all might not need to change it quite so often with synthetic oil, but it is well worth the coin. Yous really should only use constructed oil every bit well, such every bit Mobil 1. Although a 4Runner is pretty impenetrable, changing the oil is necessary and will only aid in a smoother, longer lasting vehicle.
WHAT You lot Need
There are some key components you volition need for changing the oil on your 5th Gen 4Runner. Here is a list of everything you will demand:
- 6.half dozen Quarts of 0W-xx oil (I recommend Mobil i)
- Factory Oil Filter or the TRD Oil Filter
- Funnel
- Oil drain plug gaskets
- Rags for cleanup and to wipe away any oil
- ten, 12, and xiv mm sockets
- Ratchet bulldoze for sockets (3/8-inch)
- 64mm oil filter wrench
- Oil catch pan
- Latex gloves
- Owners manual might aid
HOW TO Change YOUR OIL – STEP BY Stride
Step i – Adept Location
The first pace is to find a location to change the oil on your motorcar. I can fit under my 4Runner without any ramps or a elevator; however, if yous demand and or prefer to raise your car upwards, do so appropriately.
Step ii – Catch some Latex Gloves
Ready to change your 4Runner's oil by putting on some latex gloves. Although this isn't necessary, I believe information technology is best to endeavour and keep your hands as clean as possible from oils and grease. Using gloves besides helps to have a quick clean up, because sometimes grease can be really hard to become off your easily.
Step 3 – Remove Sideslip Plate Embrace

If your 4Runner comes equipped with a forepart skid plate, you will need to remove the small encompass located on the skid plate that will give you admission to the oil drain plug.
You volition demand to remove this encompass past using a 12mm socket and ratchet. After removing the bolts, set the pocket-size skid plate that covers the oil bleed plug to the side. I propose placing the bolts on superlative of this small sideslip plate, so y'all can easily locate them once it is time to put this cover dorsum on.

Step four – Remove the oil drain plug

Ready to remove the oil drain plug and drain the oil from your 4Runner. In order to practice so, you lot will need to have a container to catch the oil that spills below. Although, some oil is lost from the vehicle operation, programme for at least half-dozen.6 quarts to come out (as this is how much yous put in).
After placing a container to catch the oil underneath the bleed plug, apply a 14mm socket and ratchet to unbolt the drain plug. Afterward the drain plug becomes loose enough, unscrew it past hand.
Make certain to hold on to the drain plug and try not to drop it in the oil grab container. Later on you remove the drain plug, oil will come out rapidly then exist prepared to motion your hand out of the way and let the oil drain into the container.
In the meantime, you lot tin can get alee and wipe any contaminants from the drain plug with a clean microfiber cloth. Afterwards doing so, prepare the bleed plug aside until subsequently.

Pace 5 – Remove the Front Skid Plate & Cover

While your oil is draining, go ahead and remove the front skid plate and slip plate cover. You might ask why you accept to exercise this, and the unproblematic reason is to modify the oil filter. You don't accept access to the oil filter unless you remove the front end skid plate and skid plate cover.
To remove the cover, you will need a 10mm socket and ratchet to remove five (five) bolts. There is too one (1) push pin that you will need to remove. Once you remove the cover you will then have access to remove all four (iv) bolts that hold on the skid plate.
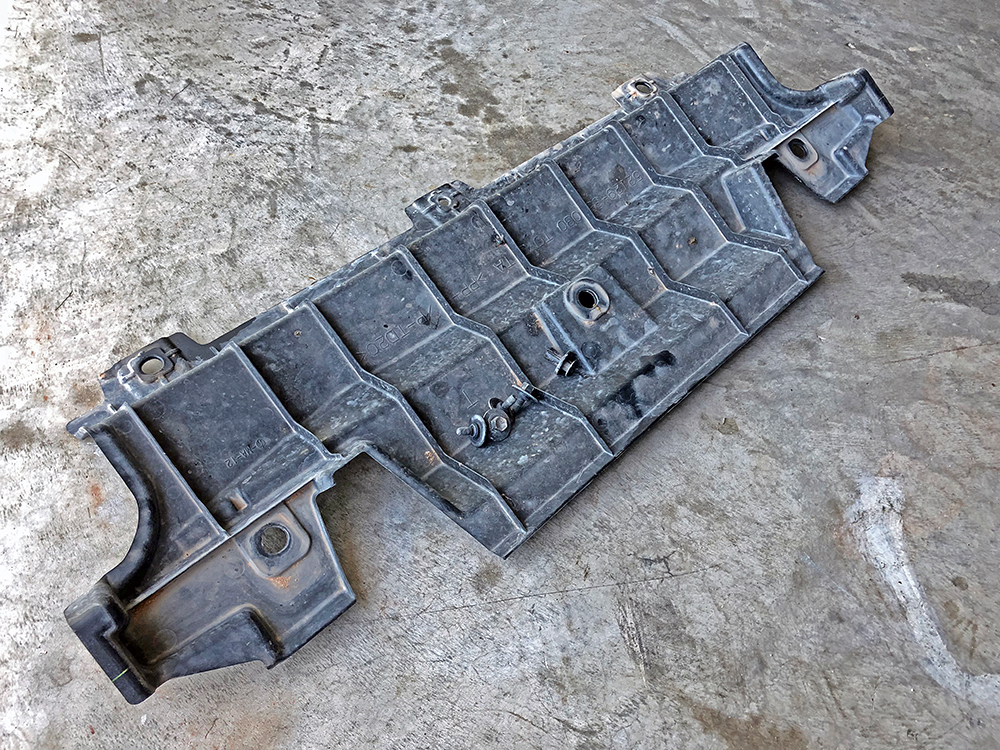
To remove these bolts, use a 12mm socket and ratchet. Give-and-take of advice that is very important: Remove the front bolts first on the sideslip plate. Later doing then you lot will need to hold upwards the skid plate while removing the back two. If you don't hold the skid plate when removing the last bolt, the sideslip plate will fall and hit you lot. Although it doesn't weigh too much, it probably won't experience good. The front of the sideslip plate is on a hinge that unhooks.

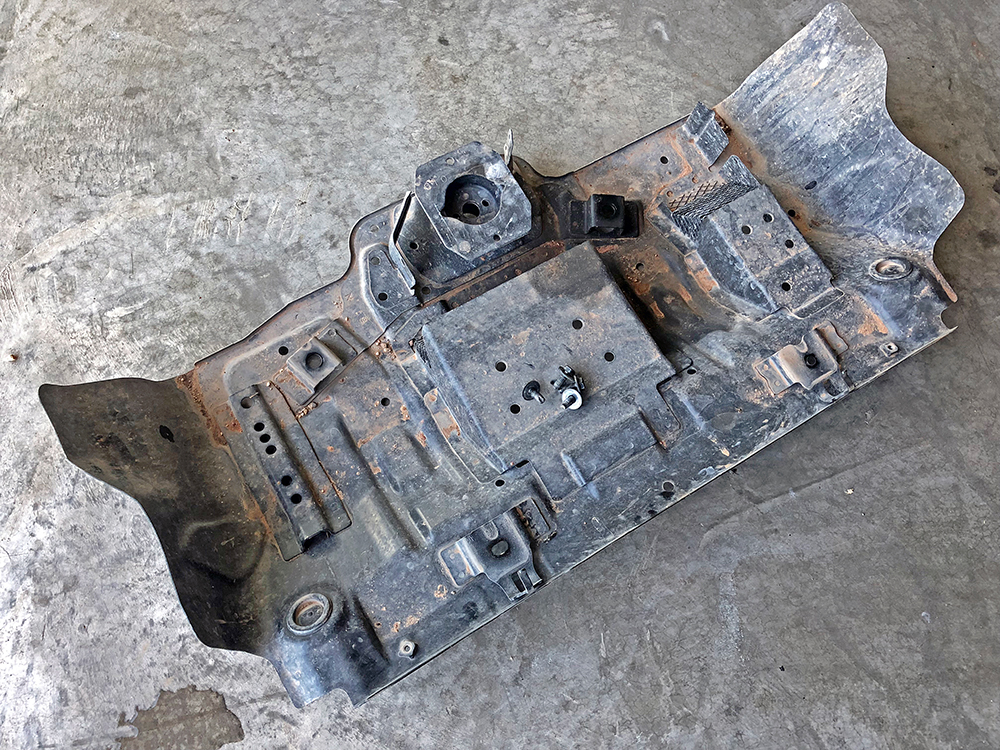
Take your time and rotate the back of the skid plate towards the footing to remove the slip plate from the hinge. Afterwards y'all remove the slip plate, ready it to the side with the bolts on or nearby.
Step six – Remove the Oil Filter
At this signal in time you will desire to remove the oil filter – which I think is the almost complex part of the entire process, but nonetheless pretty straightforward. Earlier you remove the filter go ahead and reinstall your drain plug and the small skid plate that covers the drain plug. After doing then, motility the container yous are using to grab your oil and so that it is underneath the oil filter.

Using a ratchet with a iii/8-inch extension remove the metal plug to the oil filter. Some oil will drip out then make certain you have a container to catch information technology. Your new oil filter should come up with a plastic tool to further drain out some oil. All you have to practise is button information technology into the base of the filter. Oil should drain out later doing so. Expect until the oil has finished draining and and then remove the plastic drain tool. Along with removing the plastic drain tool, a minor O-ring should also come out. This is trash, so go ahead and throw away the drain tool and the small O-ring.

Now yous can remove the actual filter. Use your 64 mm filter wrench and take off the filter housing. Make sure to note a small metallic tab on the side of the housing. This tab should align to the same location when putting the filter back on. Afterwards unscrewing the filter all the way, remove the old filter from the housing and throw it abroad.
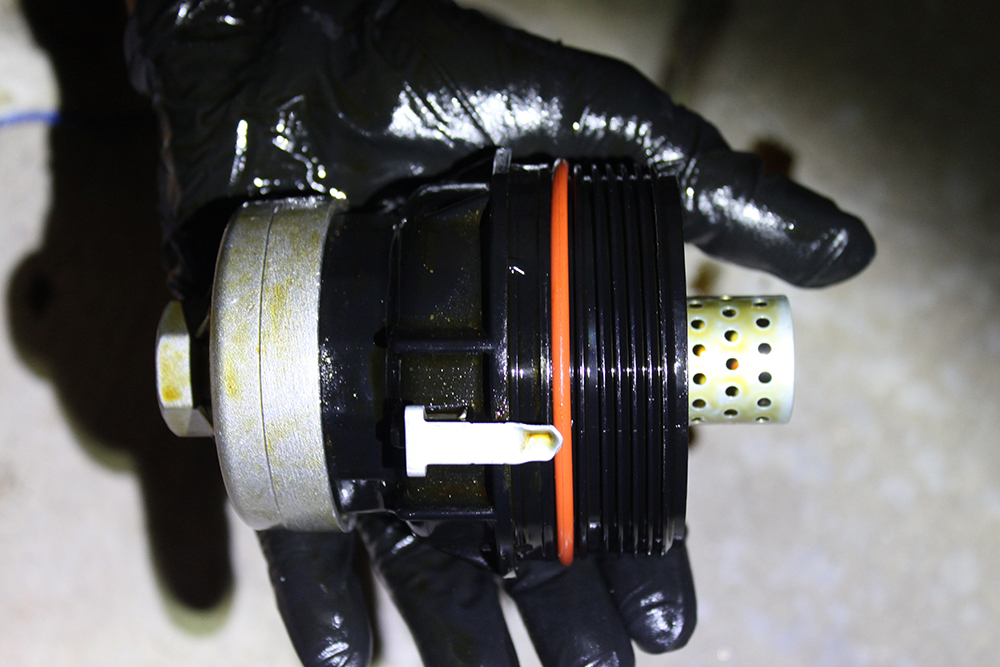
There is also an O-ring on the housing that needs to exist removed. You do non need any pry tools and should be able to remove this O-ring by hand with ease. I'd recommend doing this by hand equally you don't want to impairment the plastic threads.
Step 7 – New O-band from the filter box
Grab your new O-band from the filter box and coat information technology with a modest amount of oil. After doing so place it on the filter housing. Make sure it is seated all the fashion effectually. Side by side, place your new filter into the housing. You don't have to worry nigh orientation as there is no right mode upwards.
Step 8 – Screw the filter assembly back in
Brand sure to keep tightening until the metal indicator tab is back to its position similar it was before removing the filter housing. Now install the modest O-ring into the filter housing by first coating it in a minor amount of oil and so placing the O-band in identify on the drain area of the filter housing. After doing so, you can reinstall the metal bleed plug into the filter housing. Yous don't need to overtighten this, so just make sure it is snug.
Step ix – Oil Modify

Later on verifying that your drain plug and oil filter are back in place install six.6 quarts of 0W-20 oil into your 4Runner. Use a funnel for this as you lot do not want to spill oil on your engine.
Step x – Check for Leaks
When y'all cease installing all 6.6 quarts of oil bank check around the bleed plug and filter housing, make sure in that location are no leaks. If you can't spot any you can go ahead and install the skid plate and slip plate cover.
Step xi – Reset your maintenance light
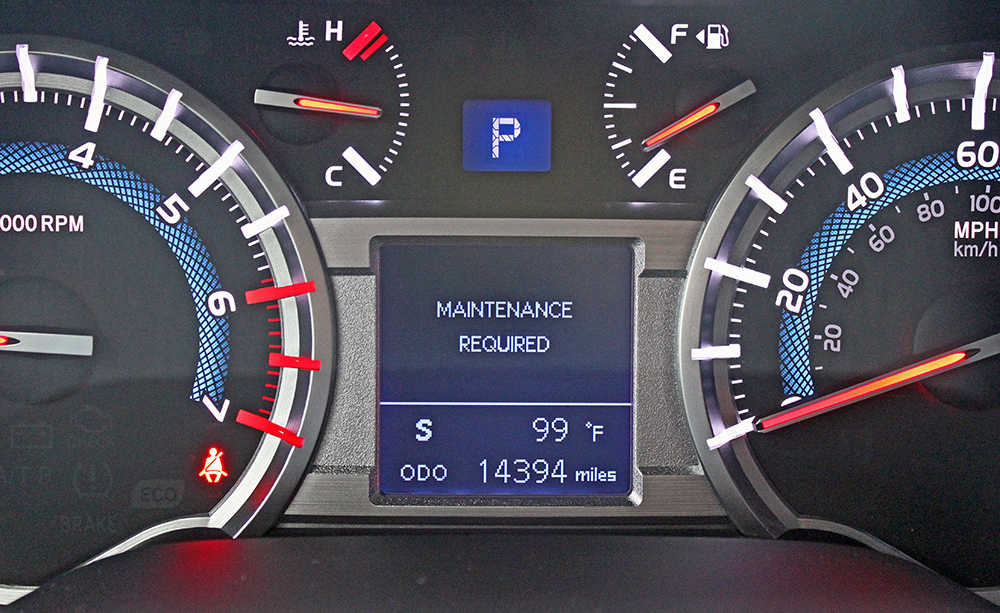
Now that you've completed the bodily oil alter procedure yous demand to reset your maintenance light and so that you know when to modify it again. To practice so you will need the primal to your vehicle.
Turn your key to accessory mode (far as the central will go without actually starting the vehicle).
Verify your odometer is showing Trip A. If it isn't, printing the knob to the right of the speedometer to get to Trip A.
After verifying it says trip A, turn the cardinal to the off position. Press and hold downwards the odometer push and then plow the key back to accessory mode. The screen should testify the maintenance resetting.
Continue to concord the odometer push button until the maintenance light has been reset. After doing this, you are good to go for another 5,000 miles.
CONCLUSION
Although there are some cars out at that place that make it a little easier to change the oil, the 4Runner'southward oil can be changed relatively easily and in a short amount of time.
Since the 4Runner is capable of going in some pretty rugged areas, you need to take the time to maintain your vehicle as all-time every bit possible and prevent any potential damage from occurring.
Taking the time to change your oil every five,000 miles with a quality synthetic, such as Mobil 1, volition only do good your vehicles operation, longevity, and reliability out on the trail and on the open up road.
Source: https://trail4runner.com/2018/06/11/5th-gen-4runner-oil-change/
Posted by: alvarezhourgen39.blogspot.com
0 Response to "How Often To Change Oil In 2015 Toyota 4runner"
Post a Comment